
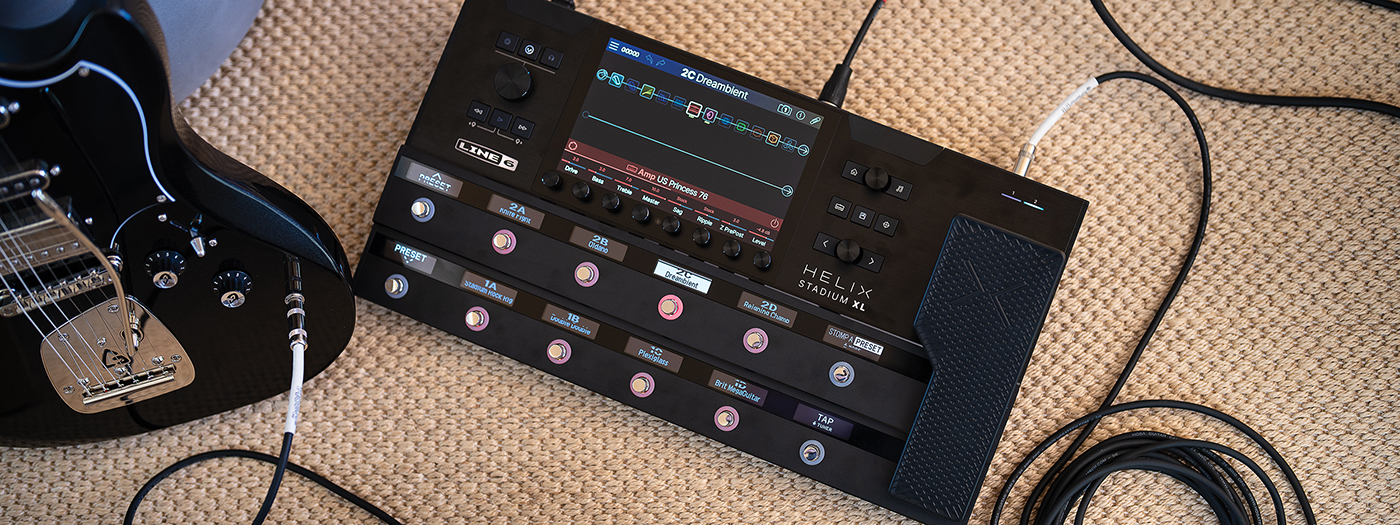
Perfect Practice with Helix Stadium Part 2: Creating Drones and Harmony Beds
by Christian Basener
In Part 1 of this series, we looked at how practicing with a metronome can improve your timing and rhythmic accuracy. But great musicianship isn’t just about rhythm. It’s also about hearing how notes relate to harmony.
One of the challenges with practicing scales, modes, and arpeggios is that they can feel disconnected from real music when played in isolation. Adding a simple harmonic backdrop immediately changes that, helping your ears connect technical exercises with the sounds you’re trying to create.
In this article, we’ll explore two powerful ways to add harmonic context to your practice sessions using Helix Stadium: creating a sustained drone and building an evolving harmony bed with Poly Sustain.
Creating A Drone
Best for: Modes, scales and ear training.
One way to create harmonic context is with a drone – a low sustaining pitch or harmony that anchors any melody played over it.
This is especially helpful when practicing the diatonic modes from the same root note, as it lets you hear the character of each mode against the same tonal centre. You could, for example, set up a low E drone and play the different modes in E against it, such as E Dorian, E Phrygian, E Lydian, or the modes of Harmonic and Melodic Minor.
Here’s an Example of playing all seven diatonic modes over an E Drone.
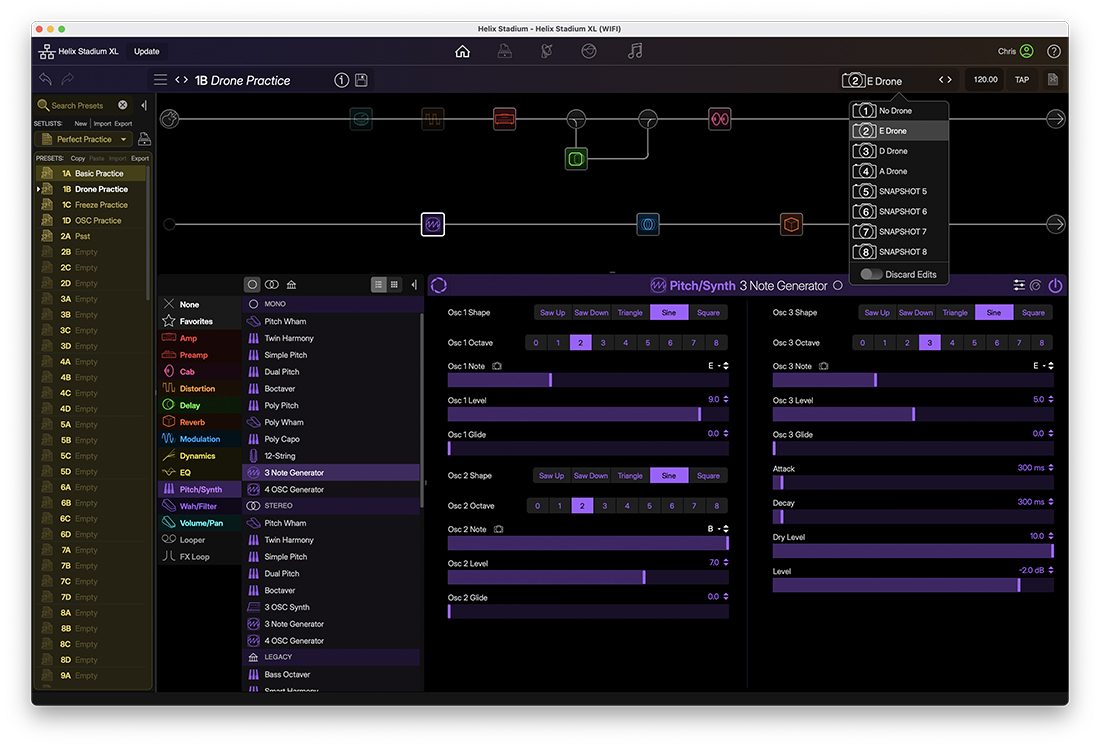
To set up a drone on your Helix® Stadium, use the second signal path and add it to your basic preset. Make sure the input is set to None.
Next, select the 3 Note Generator from the Pitch/Synth category. Set the Osc Shape to Sine for a smooth sound. Then set Osc1 Note to E and Osc2 Note to B, with both Osc1 Oct and Osc2 Oct set to 2. Finally, set Osc3 Note to E and Osc3 Oct to 3. Voila, you’ve just created an E5 power chord. Set the level for each note so that they are balanced. This is your basic drone.
You can of course experiment with other Oscillator shapes, octaves and pitches.
Next, add a modulation effect to give the drone a bit of movement – I like the Ampeg® Liquifier Chorus but feel free to experiment. Finally, I add a Cave Reverb to round it off.
Now simply assign the bypass status of the 3 Note Generator to a Snapshot. Snapshot 1 is Off and Snapshot 2 is On. To access the Snapshots quickly, assign them to different footswitches.
You can assign the Oscillator pitches to Snapshots too, so you can change the drone with a press of a footswitch. And hey presto, you’ve created your own bass pedals inside Helix Stadium.
Bonus Tip: You can also use a drone during a live performance for song intros, atmospheric soundscapes or as a bed for your guitar solo spot.
Download Preset
Download the Drone preset featuring the Line 6 original 3 Note Generator effect used in this example and experiment with different root notes and voicings.
Creating A Harmony Bed
Best for: Arpeggios, interval recognition and improvisation.
Using a drone for harmonic context is a great start, but being able to create more colourful harmonies is even more powerful when practicing scales and arpeggios.
For that, you can use Poly Sustain from the Delay category. This allows you to play a chord and “freeze” it, creating a rich harmonic backdrop to play over.
Building on the preset from earlier, replace the 3 Note Generator block with a Poly Sustain block and add a compressor and clean amp. Add some modulation and reverb after the amp for ambience and a bit of movement. Make sure the input block on the second signal path is set to Instrument.
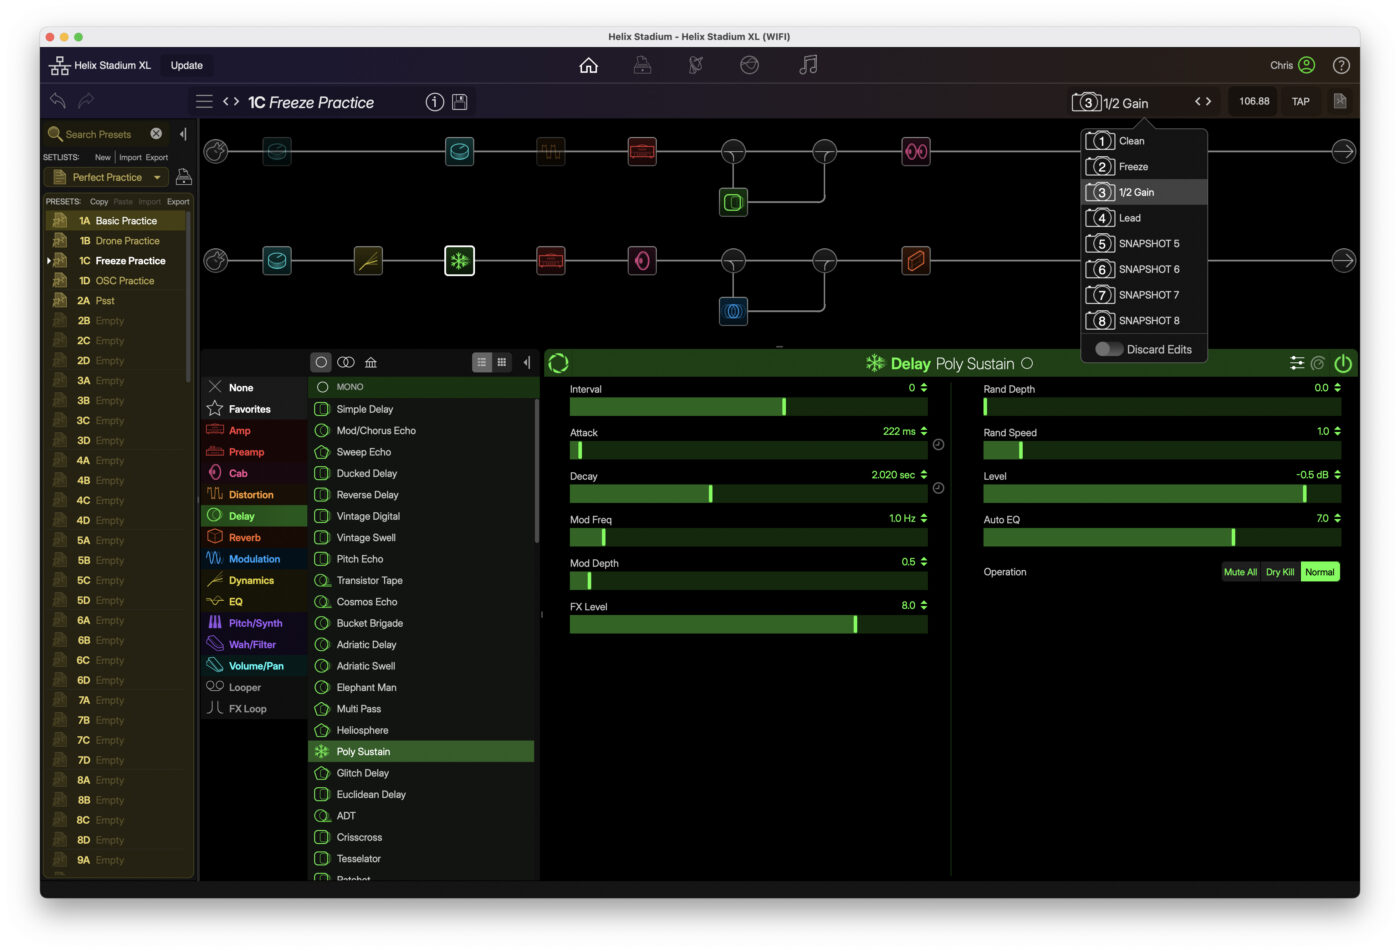
I also like to add a Gain block with the level set to -120 dB, which effectively stops any audio from passing through. This acts as a simple signal mute block and is my preferred method for controlling the signal path rather than assigning volume to Snapshots.
I place a Gain block at the start of both signal paths and assign them to Snapshot 1. On signal path 1, the Gain block is engaged (muted), while on signal path 2 it is bypassed. This means only signal path 2 (our Poly Sustain path) is passing audio.
For Snapshot 2, simply engage the Poly Sustain block. I like to set the Attack to 222 ms and the Decay to 2 seconds, but feel free to experiment and find what works for you.
Now you can play a chord using Snapshot 1 and let it ring. When you switch to Snapshot 2, Poly Sustain will freeze the sustaining pitches while preserving the harmony.
For Snapshot 3, bypass the Gain block on signal path 1 to unmute your lead sound, then engage the Gain block on signal path 2 to mute the clean guitar.
Now you can play melodies, arpeggios or even chord clusters against a harmonically rich backdrop and really hear the colour of the different intervals within a scale or chord.
Here’s an example using a rich Em add9 voicing and improvising using the ½ Gain and then the Lead Snapshot.
Download Preset
Download the Harmony Bed preset featuring the Line 6 original Poly Sustain effect used in this example.
Coming Up Next
Now that we’ve added harmonic context to our practice routine, it’s time to add some more rhythmic context too.
In Part 3, we’ll look at how the Showcase™ playback engine in Helix Stadium can be used with drum loops to create realistic practice environments that make technique exercises feel more like playing with a real drummer.
Chris Basener is Channel Marketing Manager, EMEA at Yamaha Guitar Group and a Munich Guitar Institute (MGI) graduate who has spent years performing live, recording, releasing original music, and helping guitarists develop their skills. Based in the UK, he can often be found planning trips to places most tourists overlook or being supervised by his two cats, Lemmy and Ozzy, who remain unimpressed by his guitar-playing antics.



Leave a Reply
You must be logged in to post a comment.